


Alexa one Node Red
Well, we continue with tutorials that from my point of view and experience have been great, and that is being able to use Alexa to execute tasks in Node-Red
Table of Contents
What do we need?
Well, to start, have Home Assistant installed, since here we always work with this home automation platform.
After having installed the addon Node-Red, for me one of the best addons for Home Assistant, since it allows us to create very complete visual automations.
The Skill of Node-Red For Alexa, this is easily found within your Skills listing.
Add Alexa to Node-Red
To add this node to Node-Red We have to go to the menu and select the Manage palette section.

Within this option we have to look for the following:
node-red-contrib-alexa-home-skill
Once installed we move on to the next point.
Create an Account on the Alexa Gateway
This step will allow us to create a gateway between Node-Red / Home Assistant and our Alexa devices, we have to perform the following steps:
We go to the following link https://alexa-node-red.bm.hardill.me.uk/newuser
We register and log in.
Add device in Gateway
Now we are going to create our first device, for them we first have to know what we want to control, in my case a Garage light.
In the top menu we click on the Devices button and once inside Add Device.
It will appear something like this:
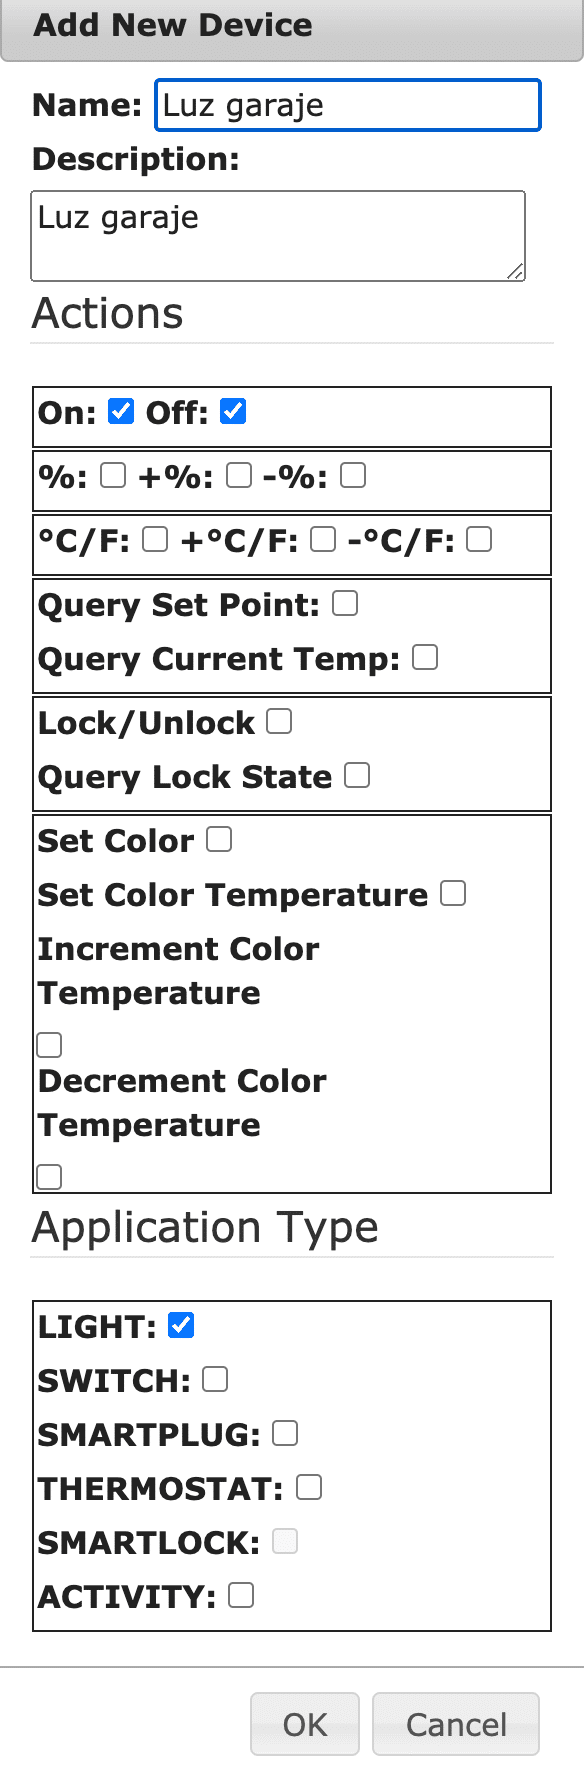
As you can see, the configuration is very simple, we add a name to our device, a description, in Actions, the operations it has to perform,
In this case “on” and “off” we are going to turn it on and off and in Application Type what type of device it is, our case as we have mentioned is a light.
We click OK and we continue.
Set up Node for Alexa
Now we turn to Node-Red In Home Assistant, in our side menu where all our nodes are, we look for those installed for Alexa.
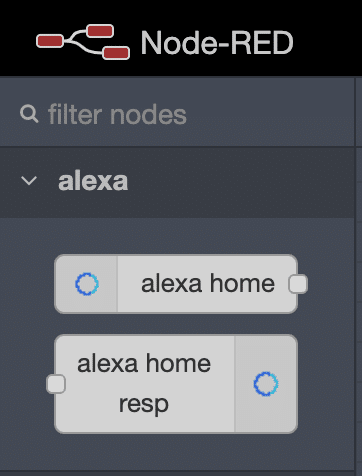
We drag the Alexa Home node to the Flow where we want it to work.
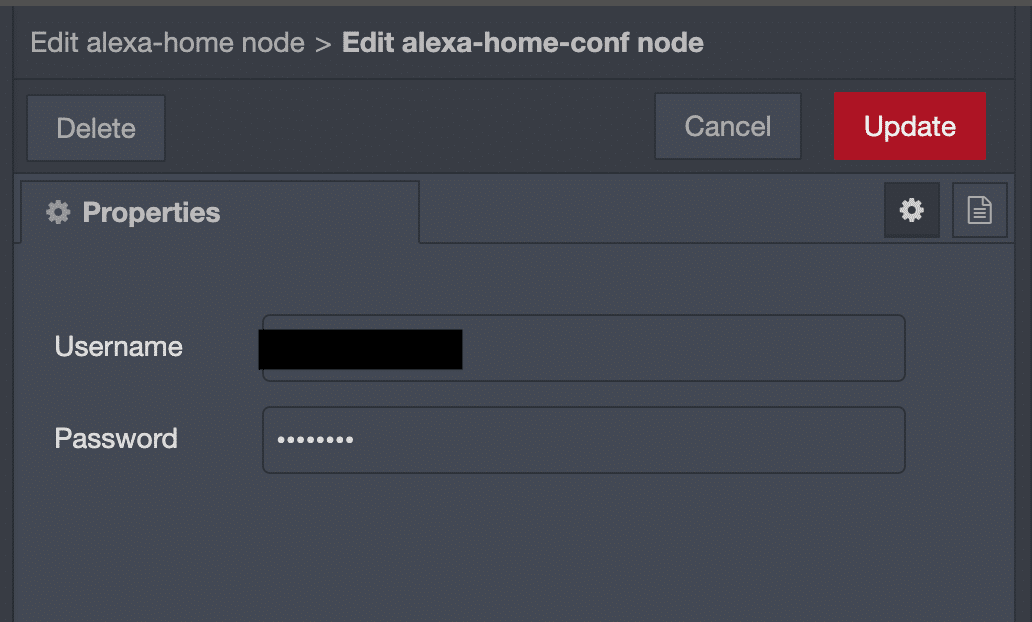
Once dragged, we open it and configure it with our registration data from the website where we previously registered and added our device.
Once this step has been completed and within the node where we have just entered our data, we select the account configured in Account.
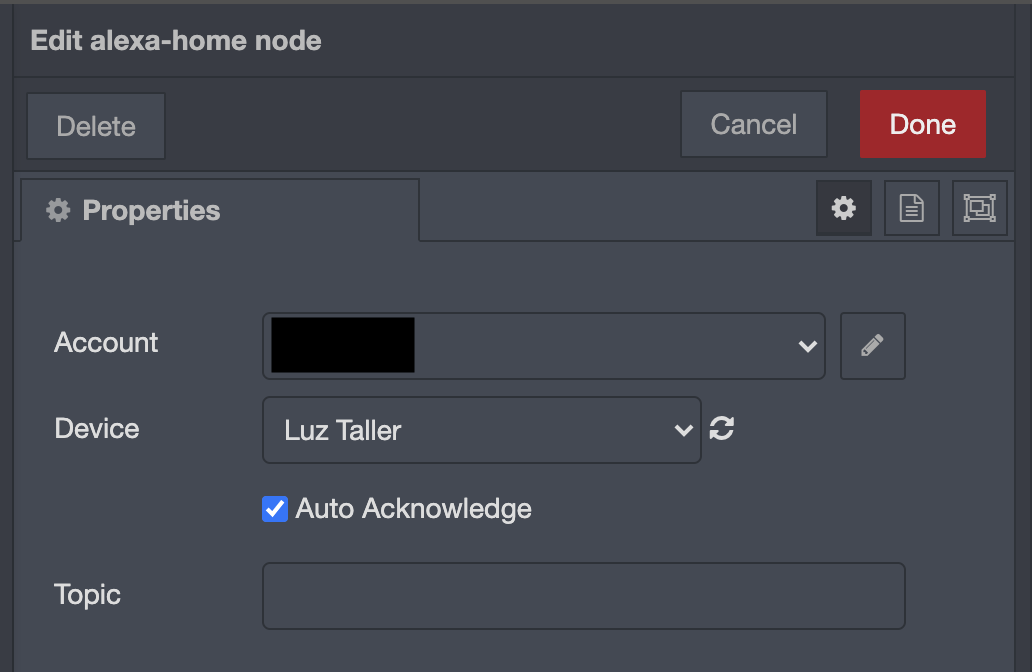
And in the Device Section we click Refresh and if everything has been configured correctly, our previously created device should appear in the gateway.
We leave the Auto Acknowledge box selected
and now we move on to link our node with the light or device to control.
Configure Node With Device
We are almost finished, now is when we have to create the task in Node Red.

We drag a Switch node to our Flow and configure it as it appears in the image.

And finally we create two nodes so that one of them activates the light and the other turns it off, simple, right?
We click Deploy and we already have our Node Red with Alexa worked.
If everything has gone correctly in the Alexa node, “Connected” should appear.
With this I conclude this small manual that will give us many possibilities, later we will create other devices with the options that it gives us from the web gateway.
I omit the installation of the Skill in Alexa because I imagine that everyone who has Alexa knows how to install it, anyway, if you need me to show you these steps, comment.
Once the Skill is installed in Alexa, we can scan new devices and the device created will appear on the gateway and that's it, you can now create a routine with your Alexa,